
部署yolov11训练点选验证码
1 本地环境安装
注意:因为部分图片是我用的笔记本截图的,所以可能有点模糊。
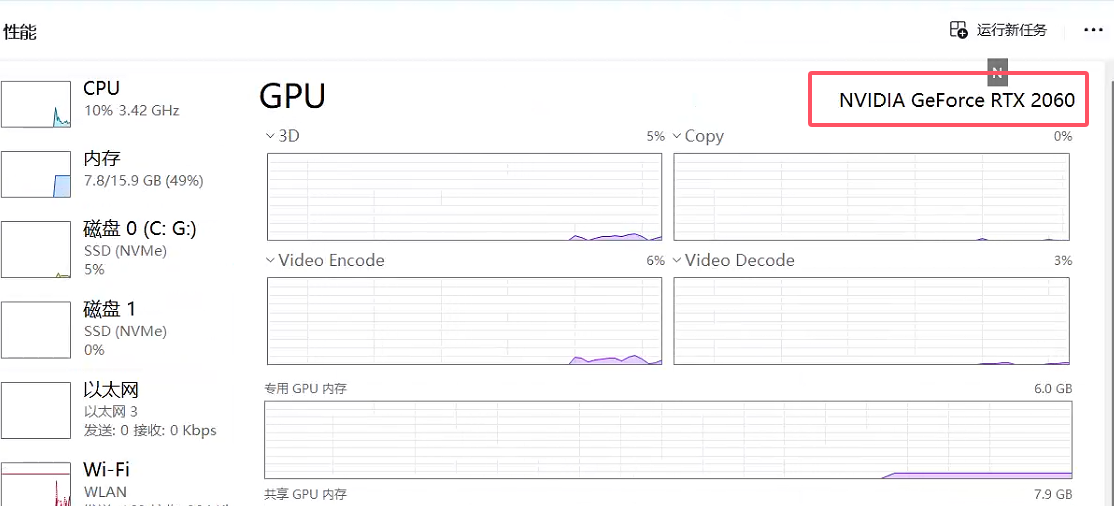
1.1 CUDA版本确认
1.1.1 确认自己的显卡
- (最好是N卡,A卡好像只能使用CPU训练)
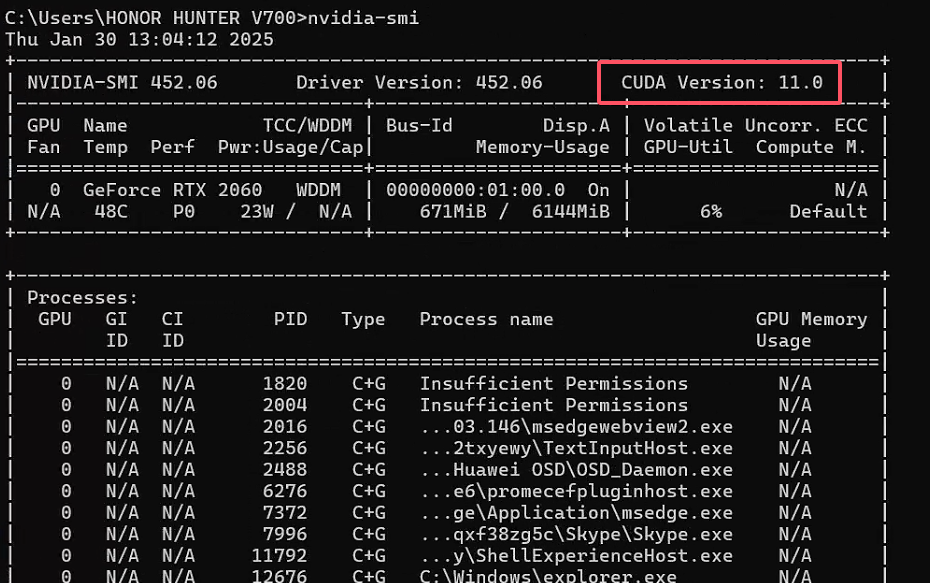
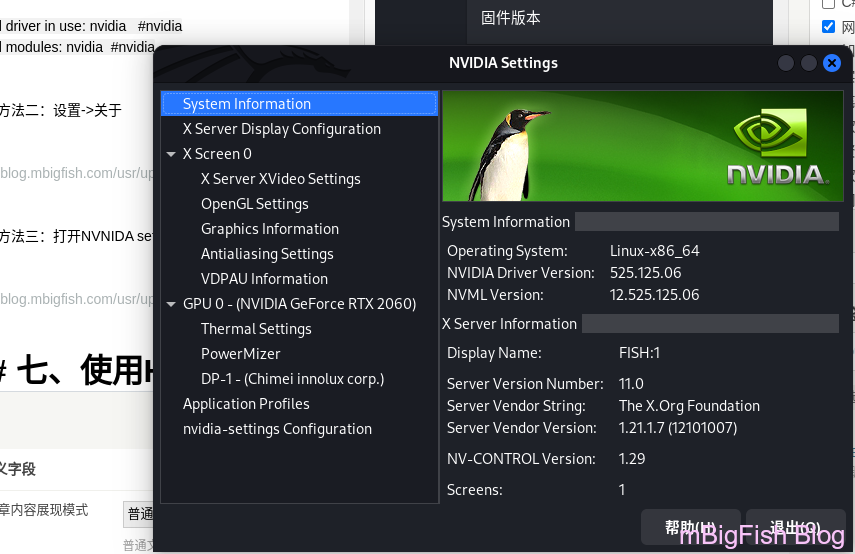
1.1.2 查看CUDA版本
1 | nvidia-smi |
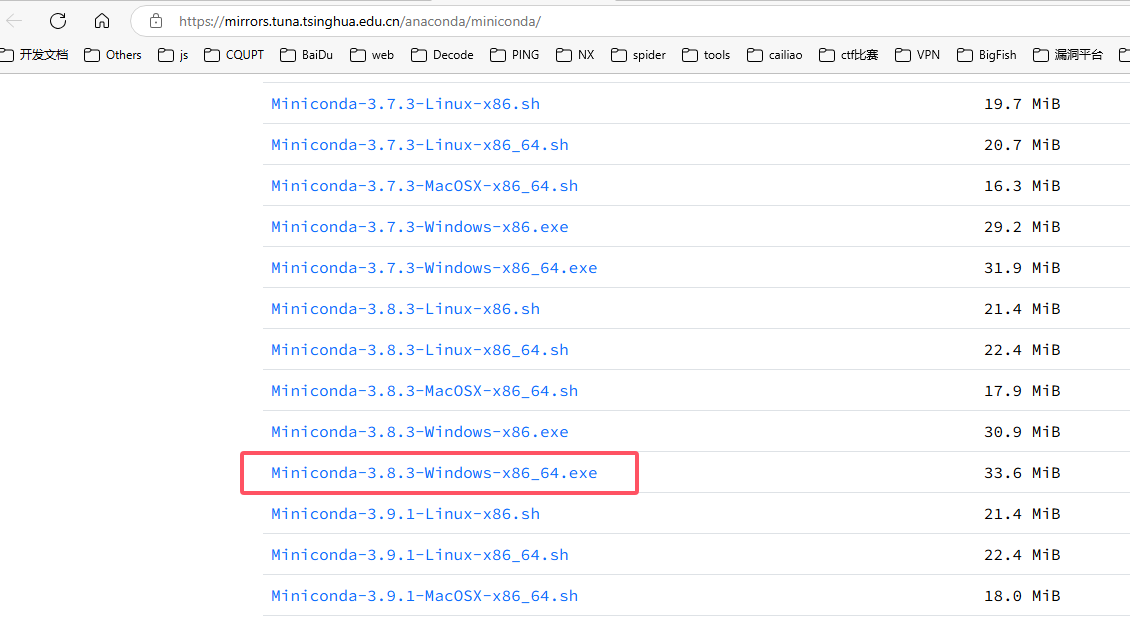
1.2 安装miniconda
1.2.1 下载地址
1 | https://mirrors.tuna.tsinghua.edu.cn/anaconda/miniconda/ |
1.2.2 选择版本
- 可以根据自己后期使用的python版本选择,也可以随便选择
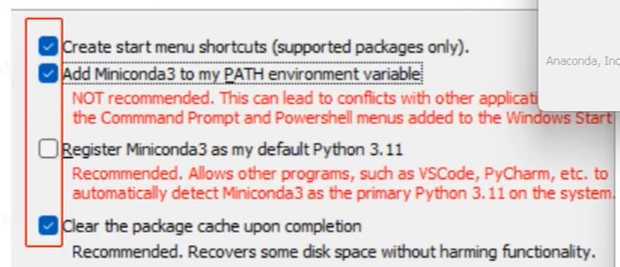
1.2.3 安装
- 记住第三条不勾选,其他勾选
1.2.4 查看是否安装成功
1 | conda --version |

1.3 conda切换源
1.3.1 常用命令
1 | # 查看镜像源 |

1.3.2 切换清华源
可以查看这里anaconda | 镜像站使用帮助 | 清华大学开源软件镜像站 | Tsinghua Open Source Mirror
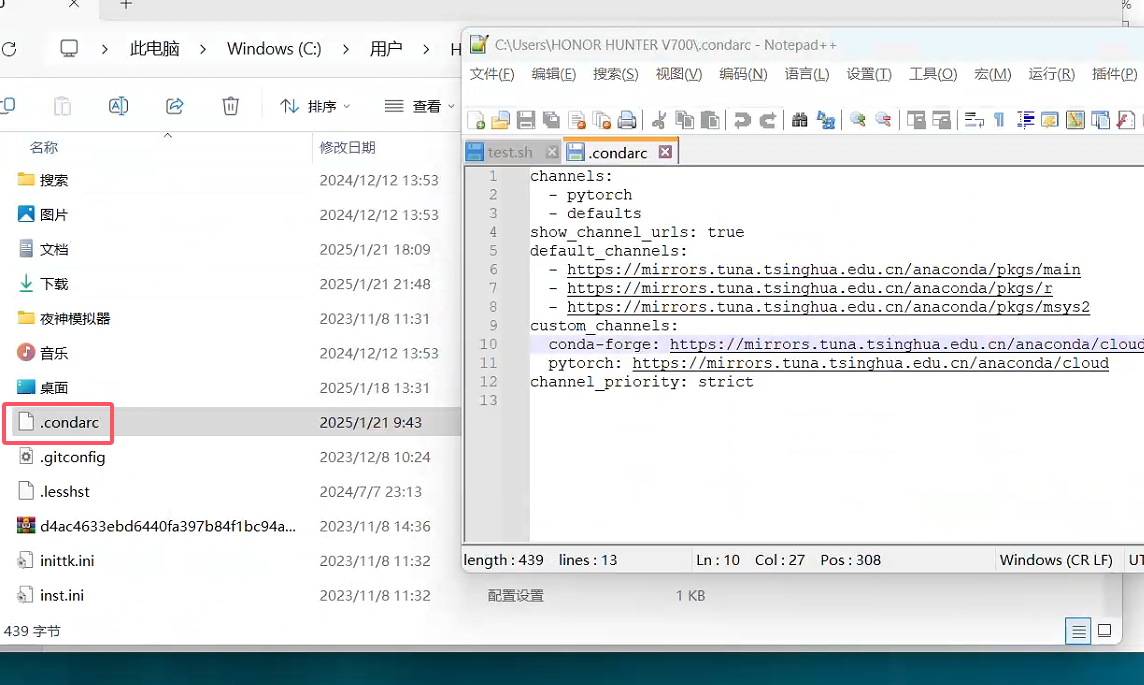
将
C:\Users\<YourUserName>\.condarc内容改成下面
1 | channels: |
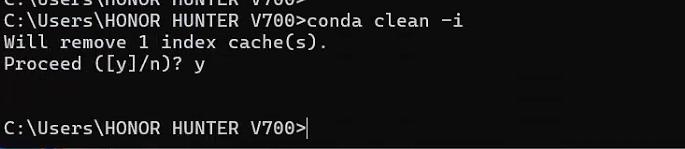
1.3.3 清除索引缓存
1 | conda clean -i |
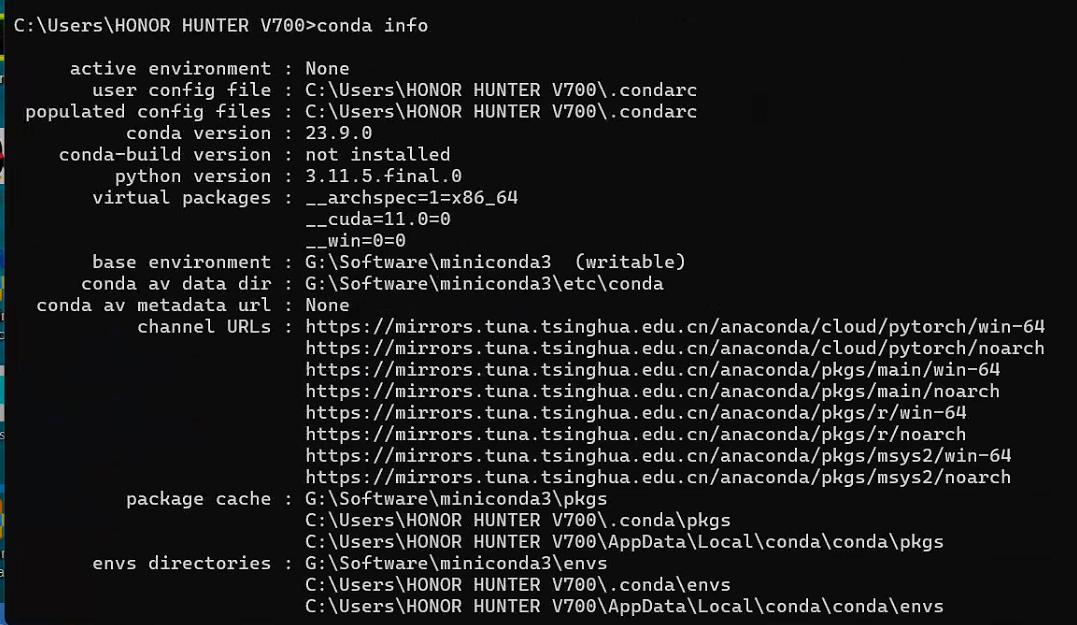
1.3.4 查看安装情况
1 | conda info |
1.4 创建虚拟环境
1.4.1 常用命令
1 | # 查看当前虚拟环境 |
1.4.2 创建虚拟环境
1 | conda create -n yolov11 python=3.8 |
1.4.3 进入虚拟环境
1 | conda activate yolov11 |

1.5 pytorch框架安装
1.5.1 部分对应版本
| torch | torchvision | Python |
|---|---|---|
main / nightly |
main / nightly |
>=3.8, <=3.12 |
2.3 |
0.18 |
>=3.8, <=3.12 |
2.2 |
0.17 |
>=3.8, <=3.11 |
2.1 |
0.16 |
>=3.8, <=3.11 |
2.0 |
0.15 |
>=3.8, <=3.11 |
1.13 |
0.14 |
>=3.7.2, <=3.10 |
1.12 |
0.13 |
>=3.7, <=3.10 |
1.11 |
0.12 |
>=3.7, <=3.10 |
1.10 |
0.11 |
>=3.6, <=3.9 |
1.9 |
0.10 |
>=3.6, <=3.9 |
1.8 |
0.9 |
>=3.6, <=3.9 |
1.7 |
0.8 |
>=3.6, <=3.9 |
1.6 |
0.7 |
>=3.6, <=3.8 |
1.5 |
0.6 |
>=3.5, <=3.8 |
1.4 |
0.5 |
==2.7, >=3.5, <=3.8 |
1.3 |
0.4.2 0.4.3 |
==2.7, >=3.5, <=3.7 |
1.2 |
0.4.1 |
==2.7, >=3.5, <=3.7 |
1.1 |
0.3 |
==2.7, >=3.5, <=3.7 |
<=1.0 |
0.2 |
==2.7, >=3.5, <=3.7 |
1.5.2 安装pytorach
1.5.2.1 注意
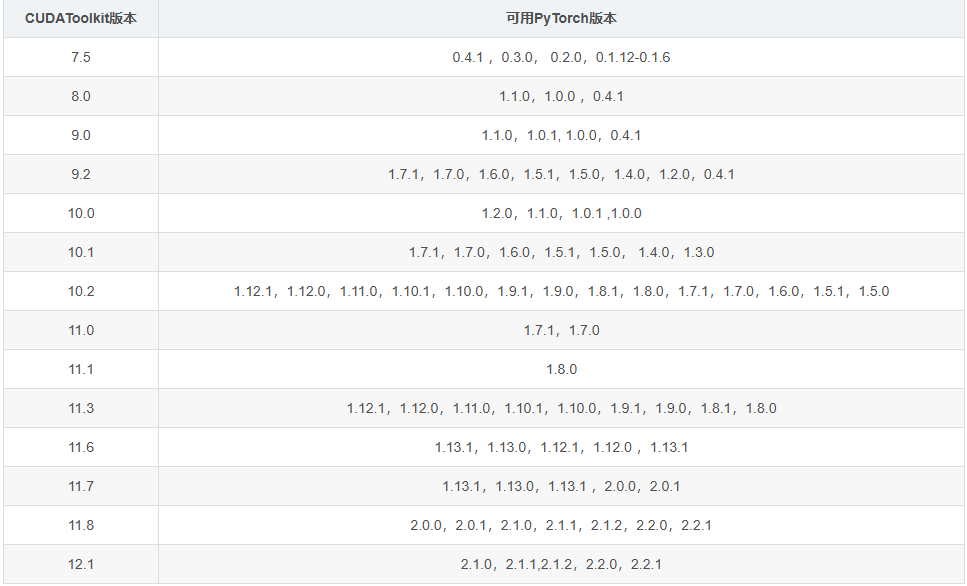
- 因为我的CUDA是
11.0,所以对于的pytorach版本是1.7.1和1.7.0 - 因为
pytorach1.7对应的python版本是3.6 - 3.9,所以我选择python版本是3.8 - 如果你对于的python版本是其他的,则需要在系统环境中将python版本设置为需要版本,且重新创建conda虚拟环境,记得python环境要符合
- 查看conda的python版本
1.5.2.2 pytorch下载地址
1 | https://pytorch.org/get-started/previous-versions/ |
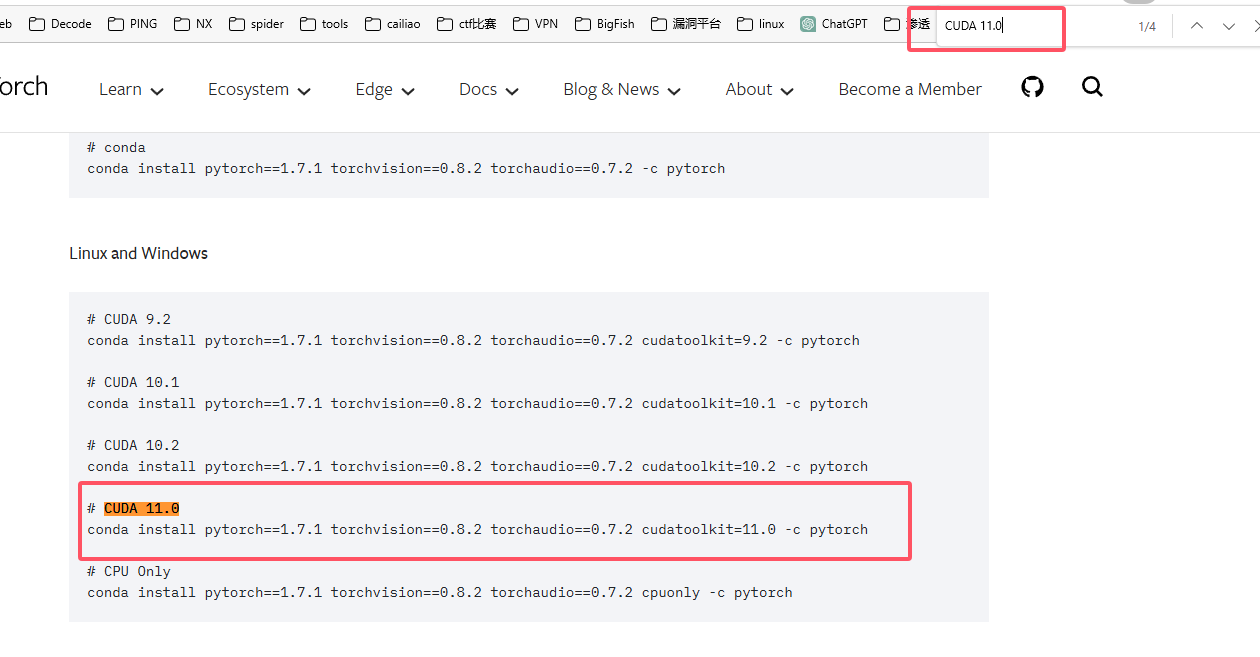
1.5.2.3 下载pytorch
1 | conda install pytorch==1.7.1 torchvision==0.8.2 torchaudio==0.7.2 cudatoolkit=11.0 -c pytorch |

1.5.3 查看安装情况
1 | python |

2 云平台部署
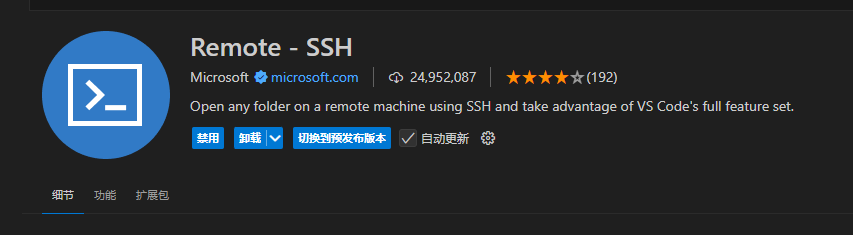
2.1 配置VScode
安装 VSCode 插件,Remote-SSH 、 Chinese (Simplified)
2.2 租用显卡
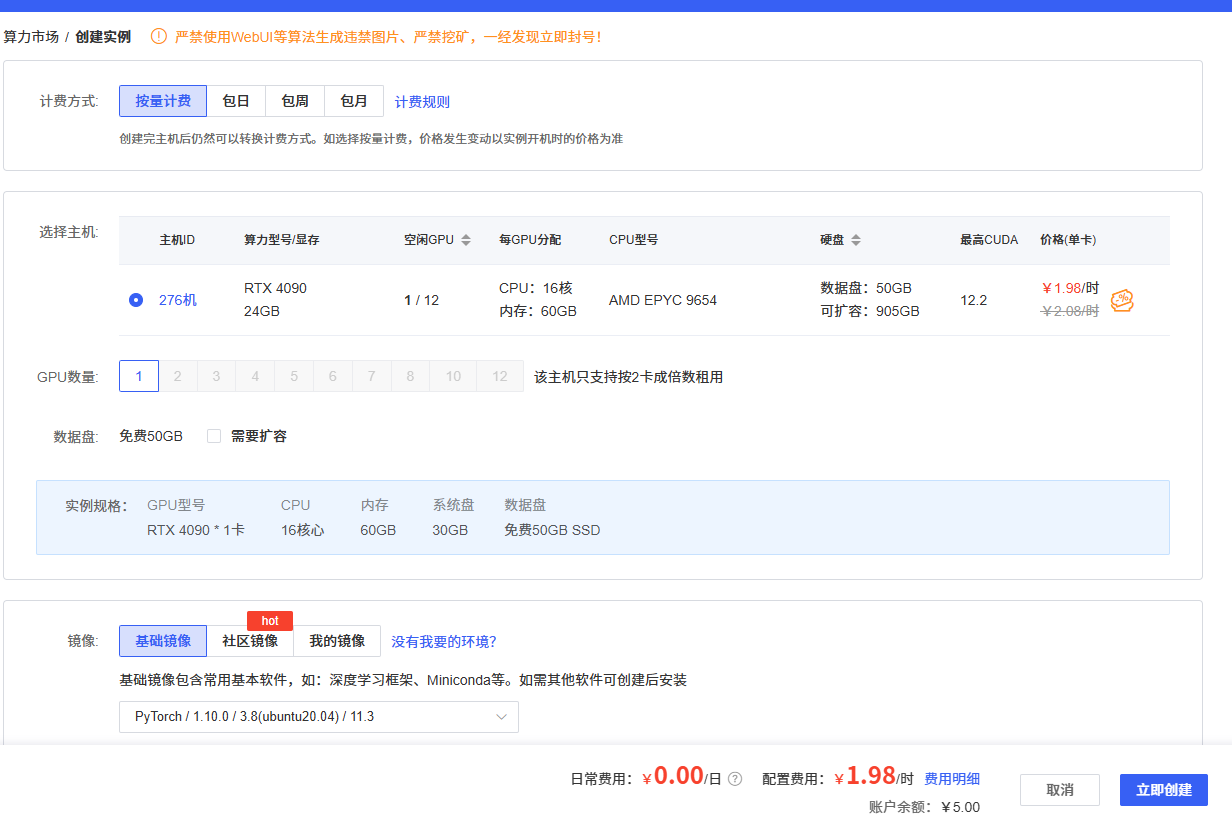
注意环境版本

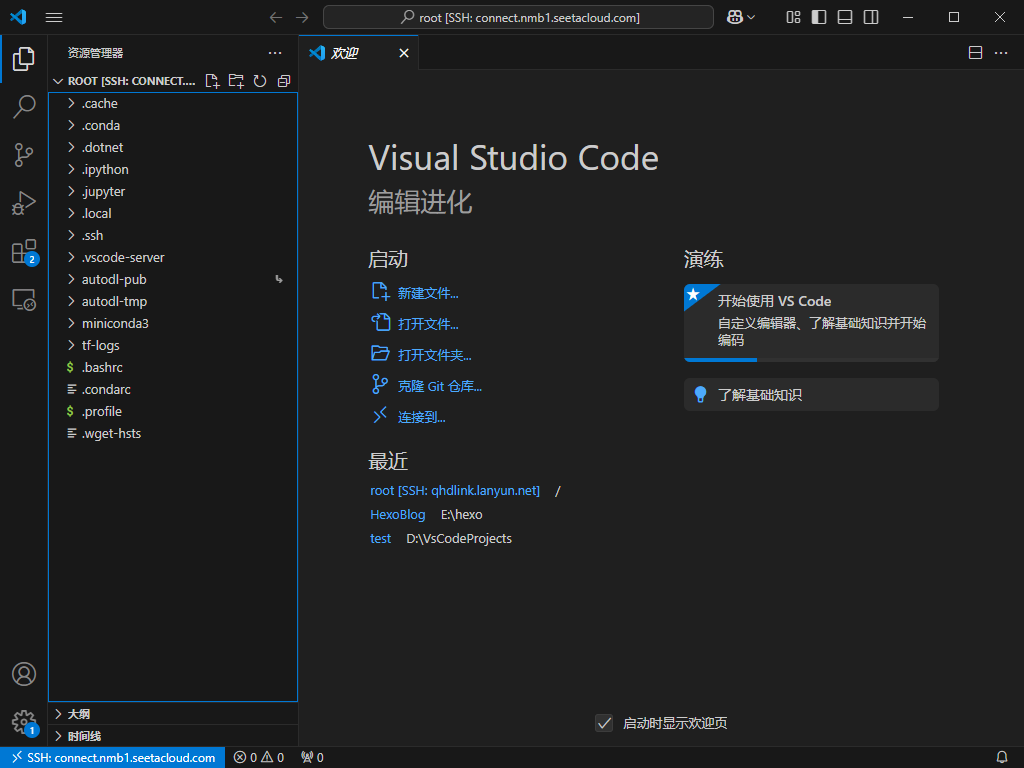
2.3 登录云服务
2.4 创建虚拟环境
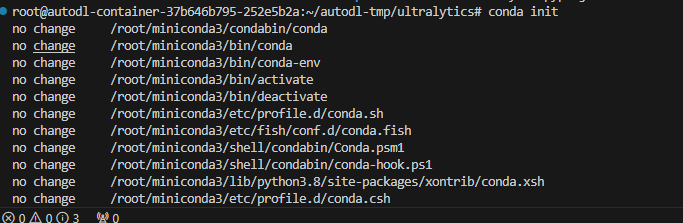
2.4.1 初始化
1 | conda init |
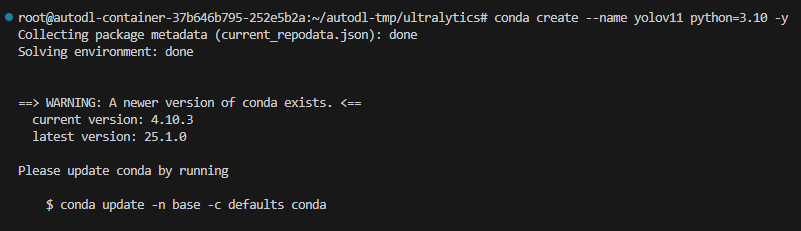
2.4.2 新建环境
1 | conda create --name yolov11 python=3.10 -y |
2.4.3 激活环境
- (记得重新打开终端页面)
1 | conda activate yolov11 |

3 开始训练
3.1 准备
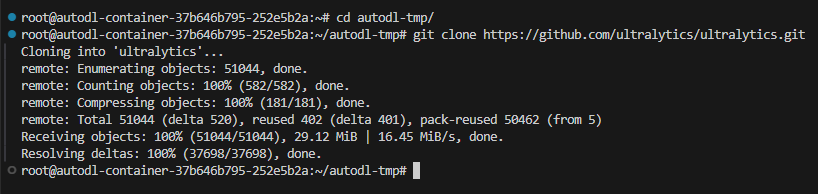
3.1.1 下载代码
1 | git clone https://github.com/ultralytics/ultralytics |
3.1.2 安装环境
1 | pip install -e . -i https://pypi.tuna.tsinghua.edu.cn/simple |

3.1.3 下载权重
1 | wget https://github.com/ultralytics/assets/releases/download/v8.3.0/yolo11n.pt |

3.1.4 上传文件
- 上传自己准备好的数据集
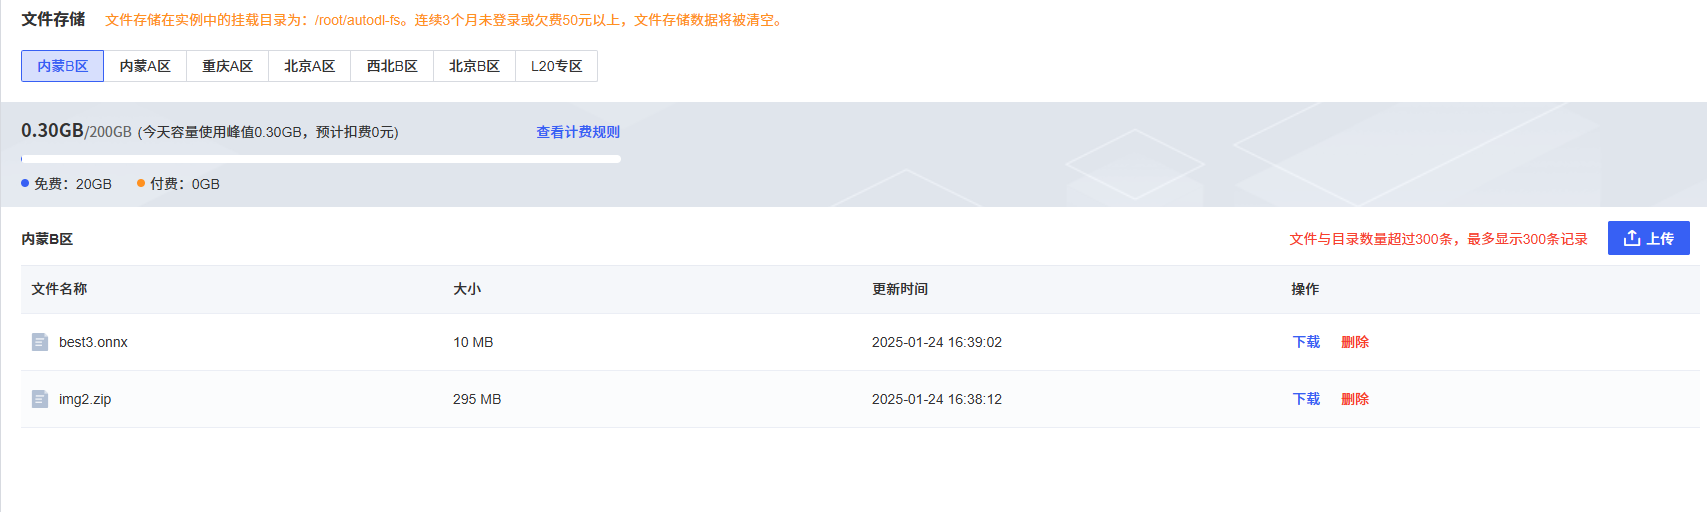
- 上传后将文件从
autodl-fs移动到autodl-tmp目录下
- 注意训练集文件格式
1 | shujuji |
3.1.4 推理文件
推理模型deletc.py文件
1 | from ultralytics import YOLO |
训练模型train.py文件
1 | from ultralytics import YOLO |
评估模型val.py文件
1 | from ultralytics import YOLO |
模型文件coco1233.yaml
- 文件目录
/root/autodl-tmp/ultralytics/ultralytics/cfg/datasets/coco128.yaml
1 | # Ultralytics 🚀 AGPL-3.0 License - https://ultralytics.com/license |
3.2 训练
3.2.1 测试模型
1 | python detect.py |
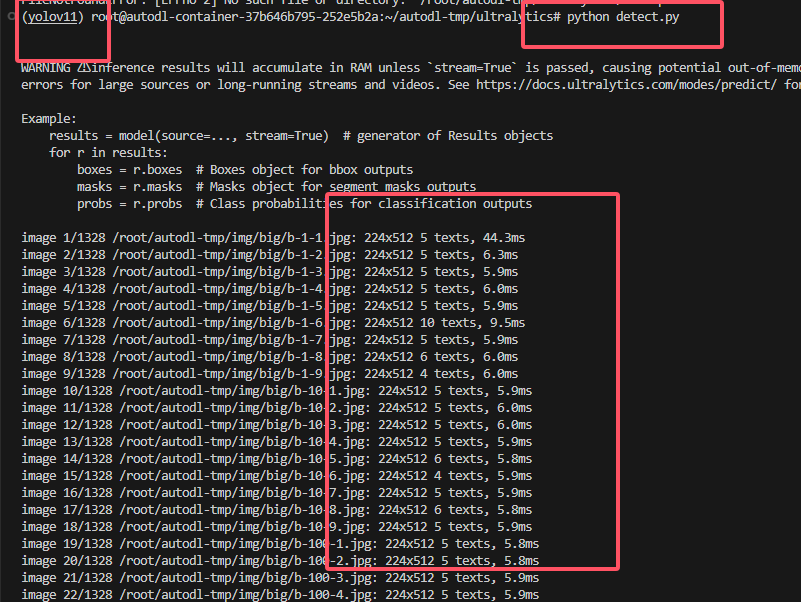
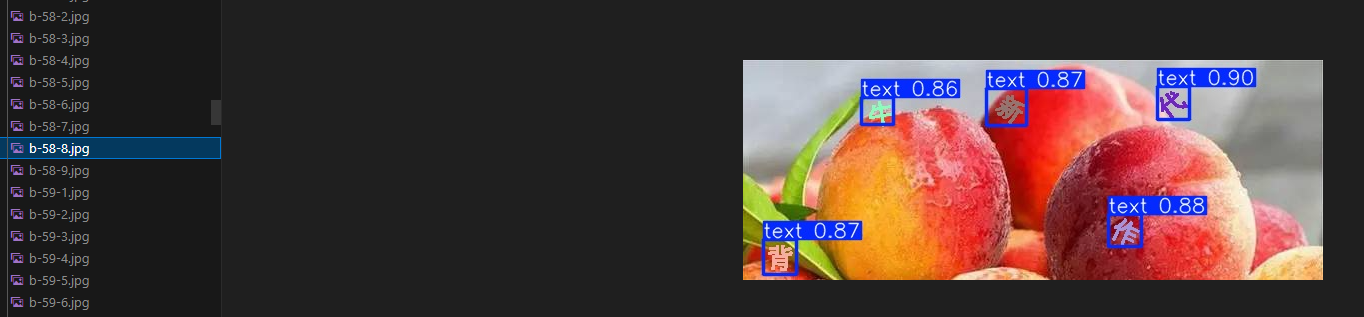
- 测试结果所在文件夹
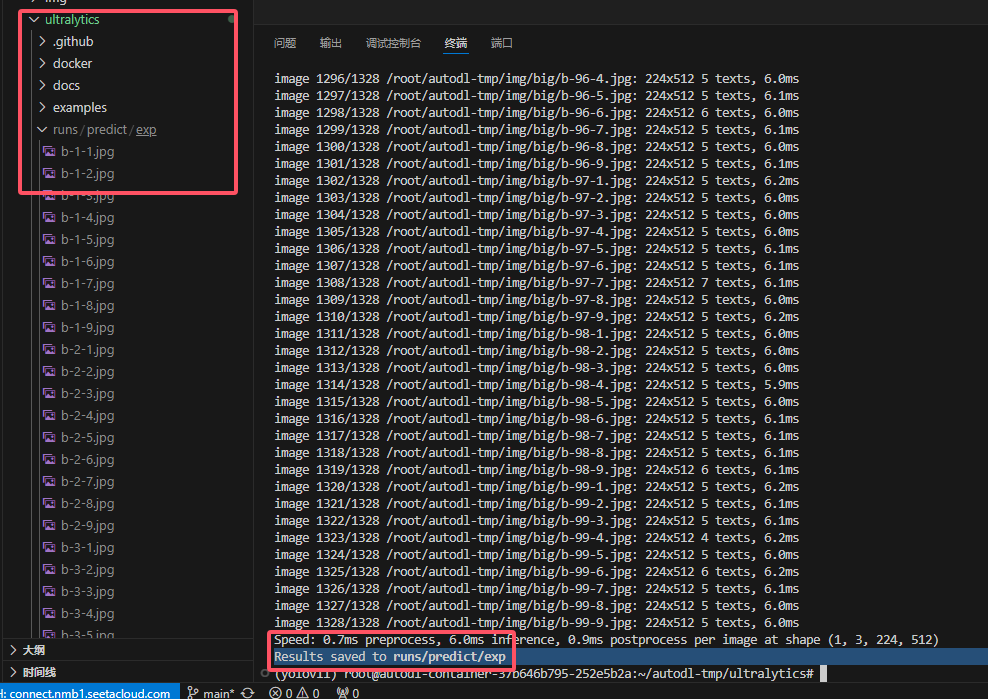
- 测试情况
3.2.2 训练模型
1 | python train.py |
4 导出使用
4.1 pt文件转成onnx文件
1 | from ultralytics import YOLO |
4.2 使用
1 | import time |
5 补充
5.1 xml转txt(批量)
1 | import os |
参考:
本博客所有文章除特别声明外,均采用 CC BY-NC-SA 4.0 许可协议。转载请注明来源 大鱼博客!
相关推荐
2024-11-08
DDNS-GO教程
DDNS-GO教程准备 首先确保有ipv6 1测试地址:http://testipv6.cn/index.html.zh_CN 如果没有,请按照网上教程开启路由器ipv6地址 (一)下载DDNS-GO1https://github.com/jeessy2/ddns-go (二)终端运行12# 确保已管理员身份运行.\ddns-go.exe -s install (三)登录设置密码1http://127.0.0.1:9876 (四)获取API Token1https://console.dnspod.cn/account/token# (五)填写ddns-go配置1、DNS配置 2、关闭IPV4 3、IPV6填写域名 4、保存之后DNS如下 此步骤无需操作,只是用来验证上述操作是否成功。 (六)关闭光猫防火墙 进入光猫管理页面(移动192.168.1.1)安全 → 防火墙 → 安全级别 → 防火墙等级 禁用 进入光猫管理页面(移动192.168.1.1)安全 → 防火墙 → 攻击保护设置 → DoS攻击保护...
2024-09-02
kali linux 上安装 NVIDIA 驱动程序
kali linux 上安装 NVIDIA 驱动程序一、更新系统1234sudo apt updatesudo apt -y full-upgradesudo apt -y autoremovereboot 二、查看已安装的显卡,并验证是否用 Nouveau 开源驱动程序1234lspci | grep -i vga#显示结果01:00.0 VGA compatible controller: NVIDIA Corporation TU106M [GeForce RTX 2060 Mobile] (rev a1) 三、获取安装有关 iuan 驱动程序的信息,01:00.0 是上面显示显卡的数字1234567lspci -s 01:00.0 -v#显示结果 #省略部分 ...... Kernel driver in use: nouveau #nouveau Kernel modules: nouveau #nouveau 四、使用 APT 包管理器将驱动程序和 CUDA Toolkit 安装以下命令1sudo apt install...
2024-09-02
proxy_pool安装教程(代理池搭建)
proxy_pool安装教程(代理池搭建)一、安装 docker12345# 官方一键安装脚本curl -fsSL https://get.docker.com | bash -s docker --mirror Aliyun#国内 daocloud一键安装命令curl -sSL https://get.daocloud.io/docker | sh 二、安装 docker-compose1234567# 这个是官方地址,可能比较慢,推荐使用下面的国内镜像地址sudo curl -L "https://github.com/docker/compose/releases/download/1.29.1/docker-compose-$(uname -s)-$(uname -m)" -o /usr/local/bin/docker-compose# 国内镜像地址curl -L https://get.daocloud.io/docker/compose/releases/download/1.29.1/docker-compose-`uname...
2024-09-03
rdesktop连接Windows远程桌面因CredSSP报错解决办法
rdesktop连接Windows远程桌面因CredSSP报错解决办法一、问题 今天在使用 kali 工具 rdesktop 连接 windows 远程桌面时,遇到以下报错问题 123Core(warning): Certificate received from server is NOT trusted by this system, an exception has been added by the user to trust this specific certificate.Failed to initialize NLA, do you have correct Kerberos TGT initialized ?Failed to connect, CredSSP required by server (check if server has disabled old TLS versions, if yes use -V option). 通过网上查找资料,发现只需关闭仅允许运行使用网络界别身份验证的远程桌面的计算机连接 (建议) 二、解决1、打开...
2024-09-02
kali连接蓝牙
kali 连接蓝牙一、启动蓝牙服务 Kali Linux 默认状态下并没有启动蓝牙服务,如果尝试打开蓝牙管理器会提示 Bluez 守护进程没有运行,不能继续。应用下列指令开启蓝牙服务: 1sudo service bluetooth start 二、配对设备 开启蓝牙服务后右上角状态栏出现了蓝牙图标。 点击蓝牙图标并选择“设置新设备“。 此时配对目标蓝牙设备,这时不会出现问题。 三、连接设备 此时可能会出现“Device successfully added.But failed to connect.” 这个问题并不是蓝牙协议或者其他原因造成的。 造成它的原因仅仅是 Blueman-manager 本身。 四、问题解决 这时候我们只需要换一种方式连接蓝牙设备就可以了。 打开 Terminal,输入: 1sudo bluetoothctl 此时会进入蓝牙管理进程。 再点击右上角的蓝牙图标,选择“设备”。 右键已经配对的设备,选择“信息”,并复制当前设备的 MAC 地址。 返回 Terminal,输入: 12trust MAC 地址(这里粘帖刚刚复制好的...
2024-09-03
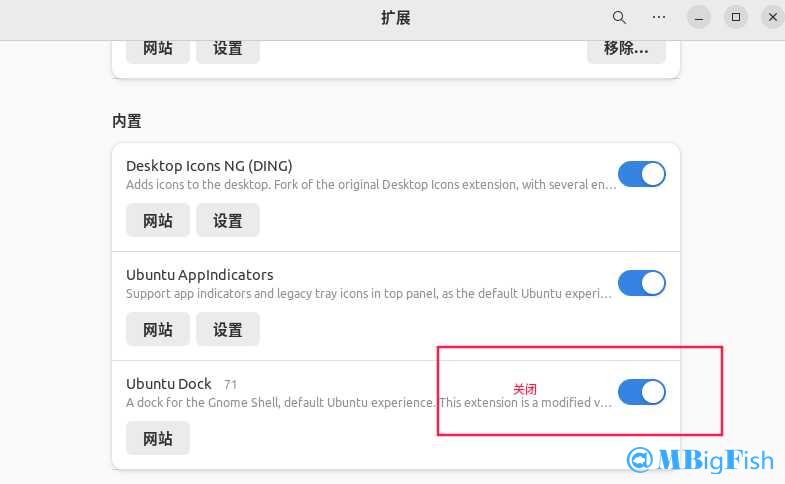
ubuntu美化
ubuntu美化一:更新源123sudo apt-get updatesudo apt-get upgrade 二:下载12345671、执行:sudo apt install gnome-tweaks chrome-gnome-shell2、执行:apt install gtk2-engines-murrine gtk2-engines-pixbuf3、执行:install sassc optipng inkscape libcanberra-gtk-module libglib2.0-dev libxml2-utils4、执行(拓展):sudo apt install gnome-shell-extensions 三:安装扩展下载地址:https://extensions.gnome.org/# 12345678910111213141516171819202122232425261. User Themes2. Coverflow Alt-Tab(切换任务)3. Screenshot Tool(截图根据)4. OpenWeather(天气)5....
评论